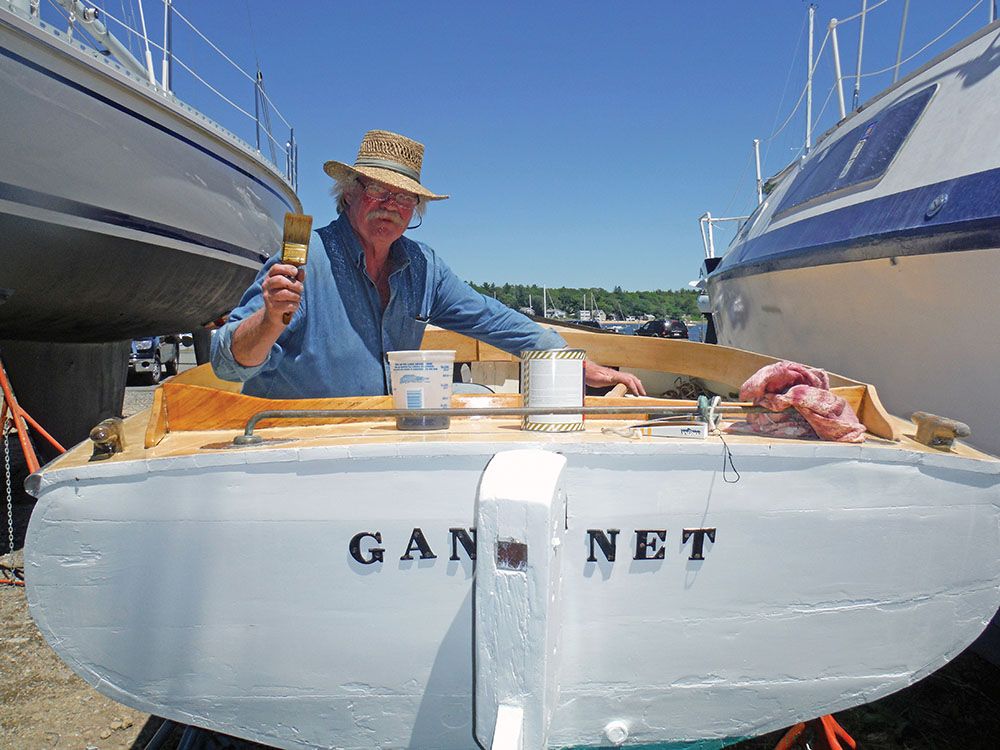
Capt. Tom Bradford touching up the cockpit coaming on his 1935 Cape Cod catboat Gannet. Tom is using Epifanes, a high-solids, high-durability Dutch varnish, thinned with a special thinner. Photo courtesy Mike Martel
May 2024
By Capt. Michael L. Martel
The famed yacht designer Captain “Nat” Herreshoff is remembered for having said, “There are only two colors to paint a boat; black, or white. And only a damned fool would paint a boat black.” But no matter what color you choose to paint your boat, you want the paint job to look right. But it doesn’t always, and for any number of reasons. Your paint job may have poor coverage and look “blotchy” or thin; there may be drips and runs, lines and brush marks; the surface may seem rough when it should be very smooth, or there may even be some loose brush bristles stuck to the surface. These results are unacceptable, of course, and there are times when you may feel that the only solution is to strip the paint off and start over! Yet, in fact, these flaws in your paint job can be avoided, even if you aren’t a professional painter or boatbuilder, just by following a few simple steps and a little practice.
Poor surface preparation
Any good paint job begins with proper surface preparation. If the paint can’t adhere well to the surface of the boat, it won’t. Or at least not for as long as it should. Flakes of loose and oxidized old paint should be removed from the surface of the hull using whatever means you choose, mechanical, chemical, or heat. Loose scale can be removed with a scraper. Then, chemical strippers work well, but they must be washed off completely afterwards with water or the appropriate solvent so that they will not compromise the new paint application. Heat-stripping works well, too, but can be dangerous or damage the hull beneath if you aren’t careful. Mechanical stripping can be laborious, but I have found that surface-conditioning tools, essentially a handheld rotating abrasive drum or wheel, are very efficient, fast, and effective. There are a number of makers of these tools that work on flat, curved, and vertical surfaces. Unlike a grinder, these tools strip off the paint but generally leave the surface material intact if you aren’t too aggressive. As my grandfather used to say, “let the tool do the work.”
You can follow the stripping process with light or fine sanding with a random orbital sander and contour pad with fine-grit paper. Go easy, go gently, and wipe or wash the surface with solvent to remove dust and oils, etc., prior to priming. A friend of mine who is a professional painter has told me that surface preparation is actually the most important part of a paint job, and I agree. He actually spends more time on surface prep than in laying down paint.
Always prime the surface
Never neglect to prime your prepared surface with an appropriate primer. It creates a foundation for the finish coat and will help ensure the durability of the paint job. It also creates a solid, opaque base, filling pores and small scratches, and most primers can also be lightly sanded. Read the manufacturer’s instructions, and apply two or more coats as suggested, adding additional coats as needed only after the prior coat has dried. The surface may appear to be dry, but if it is not, or only “skin dry,” a new application may smear, wrinkle, or create an uneven surface that later must be sanded out and primer re-applied, a laborious task and waste of time. Primer can be applied with a brush, roller, or, after appropriate thinning, sprayed, depending on the product’s instructions.
Incompatible, or poor-quality paint or thinners
There are two important things to remember with regard to compatibility: First, never use a thinner that is incompatible with the paint itself; the paint might curdle, or it might not dry properly or exhibit the durability that it would otherwise. A friend of mine once thinned the paint and primer for his boat with plain old mineral spirits, ignoring the instructions on the paint can label, and thought nothing of it until he ruined his first bucket of paint. Even if you do choose the right thinner, don’t over-thin, because this could destroy the chemistry of the paint and ruin its desirable characteristics such as adhesion. Follow the manufacturer’s ratios religiously. Lastly, be careful about mixing different primers with different finishes having varied chemistries; they are not always compatible. For example, a two-part finish with a catalyst and powerful thinner will probably not be compatible with a one-part primer. When your nice paint job begins to bubble and blister, you’ll know that they didn’t get along.
Inadequate mixing
As trivial as it may seem, inadequate mixing of paint can be responsible for a blotchy appearance in your paint job. Different elements in a can of paint have various weights or specific gravities, and different viscosities, as well. If you want your final finish to be smooth, consistent, and uniform, then you must be sure to blend your paint well, and to blend it again just prior to application. A mixing paddle wheel tool (mounted on a shaft and fitted to a hand-held drill) will accomplish this handsomely; any paint or hardware store should carry them. It will mix the thick elements that have settled to the bottom with the oils or “vehicle” that has risen to the top. Blend well, and don’t be in too much of a hurry about it. Add thinner if needed (a pre-measured amount of the right solvent per the manufacturer’s instructions, based on the application method – brush, roller, or spray) and blend it in with the mixing paddle. When the can of paint seems to be completely blended and smooth, use a flat stirring stick to test the bottom of the can and edges; if you can’t scrape off any solids with the stick, then your can of paint is properly blended. Thorough blending is also a must with any two-part epoxy paints or polyurethanes.
Poor quality tools, or the wrong brush for the job
A craftsman will always seek the right tool for a particular job, and painting is no exception. Choose a good-quality brush, first of all; not a “chip” brush or disposable type. You get what you pay for. A cheap brush will shed bristles and ruin your work. “Natural” bristle brushes are best with oil-based paints and varnishes; soft nylon brushes are best used for latex (house) paints.
Paint brushes are available in various shapes and sizes. Some are cut angular for trim, corners, etc., so choose a brush suited to the job, such as a 3-inch wide brush for topsides, for example. If you choose a brush that’s too small, you will be rushing to get coverage of the area or overloading the brush with paint to get enough onto the surface. Remember, only the ends of the brush, the tips of the bristles, apply paint, so there is no need to dip the brush deeply, up to the heel or the metal ferrule. That will only make a messy job, with the brush (and your hands) getting smeared with paint, drips where you don’t want them, and it will make the brush harder to clean. If you purchased a nice brush, then you will want to clean it thoroughly so that you can use it again and again.
Painter’s tape
Painter’s tape or masking tape helps ensure a neat job. Don’t wait for the paint to dry hard before removing it. Once the paint is tacky-dry and still soft, remove the tape. If you wait too long, the tape may pull off chips of paint along its edges.
Paint application techniques
Different painters hold a brush differently, but it is generally accepted that the brush handle should rest in the crook of the hand between thumb and index finger, with fingertips outstretched, pads against the ferrule, for proper control of the brush.
You might want to apply your paint to a larger area than you can reasonably paint with a brush. This makes sense, because paint dries much more quickly once it is applied to a surface and exposed to the air over a large area. For this reason, many painters use a roll-and-tip method of application. Simply rolling paint on doesn’t leave the type of smooth surface that most painters want. For this reason, when you can’t apply a spray finish (and not all paints are sprayable), the best and fastest application method is known as roll-and-tip. It creates a very smooth, glossy surface free of lines and brush marks. For this method, and to keep the application under control, the painter will use a small 3” or 4” foam roller or “mini” roller held in one hand, and a wetted brush in the other. You can go left to right on the hull, or right to left, one hand then the other, or swap back and forth, depending on whether you are right-handed, or you favor your left; but you load the roller (moderately) with paint, and as you roll it on, you follow fairly quickly with the brush, moving in the same direction maybe 12” behind in slow, even, following strokes. Use a light touch, just the “tip” of the brush as the name implies. Start with an area about 3’ square, move in a horizontal fashion, first in the upper area, then lower. Let the brush “grab” from the trailing edge of the previous wetted surface as you move into the next square, horizontally. Don’t wait for the first section to become tacky before starting the next section and begin with a slight overlap. Your paint should be slightly thinner than if it were to be applied by brush only. Also, be careful not to overload the roller with paint, and avoid using any “fuzzy” rollers, because they may begin to pull apart and leave clumps of nap or lint in your paint job as you are moving along.
Remember, it is better to apply multiple thinner coats of paint than one or two gloppy coats that might not dry properly, exhibiting wrinkling. Also note that you may apply additional coats once the previous coat has dried. This can be a few hours after the first one has dried, or even less depending on what the label suggests. This is often known as “hot” coating, and it is effective because the chemical interaction between the new wet coat and the semi-dry one facilitates the bonding of the two. If you wait for days, or a longer period of time, you may need to “rough” up the surface of the dry coat with a light sanding, but it is better not to wait until surface scouring is necessary.
Clean your brush
We usually don’t bother re-using rollers, but be sure to clean your brush well in fresh thinner or solvent immediately after use. Clean it in fresh solvent, then change the volume of solvent for fresh and repeat. Don’t let it soak endlessly in the solvent; take the time to actively clean it. Paint will have wicked up the bristles to the ferrule and will take time to bleed out into the solvent, and you can speed this up by flexing the bristles with your hand when in the fresh thinner. Wrap the brush in a clean rag to draw out the remainder of the paint in the brush, then dispose of the rag safely and properly. In this manner, you will prevent the brush from hardening due to paint residue left on the bristles.
Lastly, always paint wearing eye protection (safety glasses) and disposable latex or neoprene gloves, and a charcoal-filtering respirator if you are painting a high-VOC paint.
Capt. Mike Martel sails out of Bristol, R.I., holds a 100-ton master’s license and is a lifelong boating and marine industry enthusiast. He enjoys delivering boats to destinations along the U.S. East Coast and in the Caribbean and writing about his experiences on the water and other marine topics. His latest project is starting up a charter business on Narragansett Bay using a recently acquired 1928 Maine Lobster Cruiser.


 We have complete issues archived to 2009. You can read them for free by following this link.